Look what's new in The Glampette! While visiting Fred, my trailer builder and friend, in Michigan this past month (after attending the Camp-Inn Camp-Outt rally in Mauston, WI) he built me an oak countertop and shelves for the interior of my trailer.
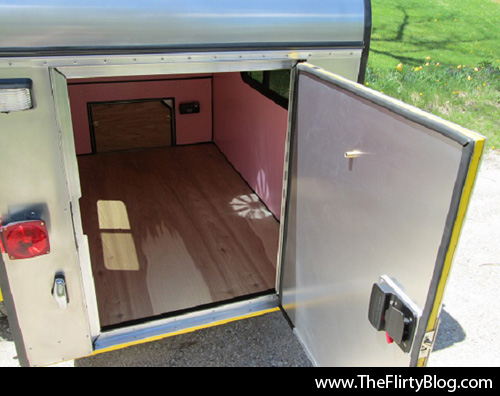
You may recall that teardrop trailers have their galley on the rear end of the trailers beneath a hatchback. Since I travel alone I wanted to move my galley to the interior of the trailer so I wouldn't have to go outside at night to grab something from the back.
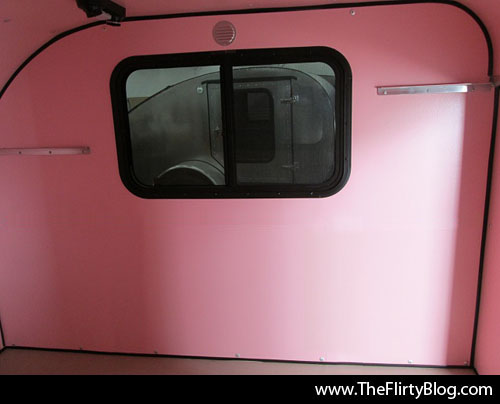
Fred took measurements based on the trailer and my preferences. Then he got to work. I LOVE my new interior. It makes my trailer look like a tiny studio apartment.
The first night I used it after leaving Michigan I was over the moon. Upon opening the door I immediately had a place to set down my purse and keys! The experience was quite luxurious compared to the old stacked-plastic-bins method I'd been using before.
Thank you Fred! You're the best :)
Other improvements include the small sleeping curtain right above the bed. In the morning the light from the vent fan would glare in my eyes. I realized a tiny curtain was all I needed to block the glare. Some fabric, pom poms, and velcro were all I needed to craft a glampy, little curtain.
Also, I was tired of things bouncing out of the pink plastic bins in the overhead shelf, so I found some aqua fabric and black parachute cord and sewed together the drawstring bags that hold the bin's contents in even on the bumpiest of roads.
One final new addition, a tiny DIY closet rod that I could hang jackets from. It's a drawer handle screwed into the underside of the overhead shelf. It worked great! The only modification I made is when traveling I tie the hangers together with a piece of ribbon around the base of the silver hooks. The ribbon keeps them from bouncing off the pull. Loose, several would fall off but tied together none do.
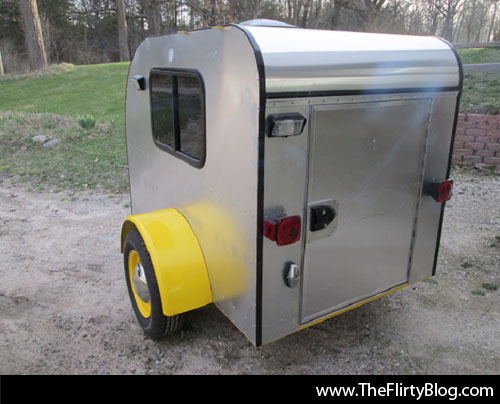
While The Glampette is still a work in progress the most significant things have all been done. There will be a few more improvements over the coming months but for now I couldn't be happier with my perfect little abode on the road :D
Showing posts with label Trailer - Build. Show all posts
Wednesday, October 30, 2013
Thursday, May 16, 2013
Trailer Update: She's done and her name is. . .
ETA: After driving to Michigan to pick her up I realized I love her just the way she is and don't want to paint the exterior except for a graphic with her name. So, as is often the case in design, I've decided to go a different direction and will be leaving her gorgeous aluminum skin uncovered even though this post says I'm going to paint her.
The tongue box is skinned and my trailer is done! This post contains the final batch of pictures my builder Fred sent me and a big reveal. Her name is a spin on Glamping, the practice of camping in a glamorous manner, combined with a nod to her petite size . . .
Isn's she adorable? She only weighs 554 pounds, well within my car's 1000 lb tow limit.
This is what she looks like now.
And, with the magic of Photoshop, this is what she'll look like painted. . .
My plan is to hire a professional auto painting company to lay the base coats and paint the large circle on the sides. The rest, I want to paint myself in a combination of by brush, stencil, and possibly air-brush. I'm an artist by nature with lots of painting experience so wielding a brush and paint isn't new to me. I'd have the pros lay on some clear coat after to protect the hand painted graphics and then she'd be done.
The things I had to consider when coming up with her graphics was the placement of the window, porch lights, wheel, and reflectors. Because The Flirty Blog is a lifestyle, food, and travel resource I wanted to convey those themes along with a fun retro vibe. This is what I've come up with:
And because it was my introduction to Sonoma Wine Country last year that really got the ball rolling on acquiring a travel trailer, I want to pay homage to the many wine growers, makers, and tasty wines I've met there.
I opted for a mini canned ham shape so I'd be able to sit up inside with (relatively speaking) plenty of overhead space above the top of my head.
Instead of the hatchback that distinguishes teardrop trailers from all other styles, Fred suggested putting a swing out door on the rear so he could make my access in and out of the trailer easier.
He also added a rain gutter above the door and just beneath it the circular shape is an awning rail in case I want to set up some shade off the back end on sunny days.
Her tongue box is skinned and the only access is from the inside of the trailer. This will make it harder for battery thieves to steal my on board battery, a common problem for RV'ers.
And still thrilled we powder-coated the chassis, wheels, and fenders bright yellow.
She's ready and waiting for me. Soon I'll be hitting the road. Of course I'll be taking lots of pictures and blogging all about my trip! This will be my first time driving east of California so it's bound to be quite the adventure.
And here are the posts about my maiden voyage driving to pick up The Glampette in Michigan:
The tongue box is skinned and my trailer is done! This post contains the final batch of pictures my builder Fred sent me and a big reveal. Her name is a spin on Glamping, the practice of camping in a glamorous manner, combined with a nod to her petite size . . .
Meet my tiny travel trailer "The Glampette!"
Isn's she adorable? She only weighs 554 pounds, well within my car's 1000 lb tow limit.
This is what she looks like now.
And, with the magic of Photoshop, this is what she'll look like painted. . .
Eeeeeeeeeeeeeek! She's gonna be so cute!
My plan is to hire a professional auto painting company to lay the base coats and paint the large circle on the sides. The rest, I want to paint myself in a combination of by brush, stencil, and possibly air-brush. I'm an artist by nature with lots of painting experience so wielding a brush and paint isn't new to me. I'd have the pros lay on some clear coat after to protect the hand painted graphics and then she'd be done.
The things I had to consider when coming up with her graphics was the placement of the window, porch lights, wheel, and reflectors. Because The Flirty Blog is a lifestyle, food, and travel resource I wanted to convey those themes along with a fun retro vibe. This is what I've come up with:
You can never go wrong with cake.
And because it was my introduction to Sonoma Wine Country last year that really got the ball rolling on acquiring a travel trailer, I want to pay homage to the many wine growers, makers, and tasty wines I've met there.
Here are close ups of the details.
I opted for a mini canned ham shape so I'd be able to sit up inside with (relatively speaking) plenty of overhead space above the top of my head.
Instead of the hatchback that distinguishes teardrop trailers from all other styles, Fred suggested putting a swing out door on the rear so he could make my access in and out of the trailer easier.
He also added a rain gutter above the door and just beneath it the circular shape is an awning rail in case I want to set up some shade off the back end on sunny days.
The door swings open for easy access. I'll be building some cute, retro styled cabinets for the interior galley.
Her tongue box is skinned and the only access is from the inside of the trailer. This will make it harder for battery thieves to steal my on board battery, a common problem for RV'ers.
The tongue, wiring for the trailer lights, and safety chains.
I'm still over the moon for my baby moon hubcaps.
And still thrilled we powder-coated the chassis, wheels, and fenders bright yellow.
Here's an undercarriage shot.
And another.
She's ready and waiting for me. Soon I'll be hitting the road. Of course I'll be taking lots of pictures and blogging all about my trip! This will be my first time driving east of California so it's bound to be quite the adventure.
And here are the posts about my maiden voyage driving to pick up The Glampette in Michigan:
Day 8 Part 2: Around the lake and on to Wisconsin Wine Country
Day 10: It could have been worse
Day 10 continued: Overnight at a Walmart, a traveler's rite of passage
Labels:
Trailer - Build,
Trailer - The Glampette
Tuesday, May 14, 2013
Trailer Update: The interior shelves are installed
This is the underside of the front shelf above the tongue box door. Fred installed them and I'll paint them aqua when I get the trailer home.
It'll look like this!
The shelf has a lip to hold small baskets or bins in place while I'm on the road.
I'll probably paint the tongue box pink too. Or maybe I'll add a decorative design.
To the right of the tongue box door is my DC/USB power strip. It won't be a problem to recharge my camera batteries or cell phone while I'm sleeping at night.
Inside the freshly skinned tongue box.
My view out from inside.
What it will look like painted aqua.
Those are the porch light switches underneath the rear shelf.
The rear overhead shelf.
I'm so excited. It's so cute. Now I just have to find some little bins for them.
I'm very happy for Fred that his tulips are blooming. I could see them through the open trailer door :)
And I'm hoping the freak snow storms are over and done with in the Midwest since I don't want to be driving in snow on my way to or from Michigan.
My next update will be the finished exterior of my tiny travel trailer!
To follow my entire build thread from beginning to end just click on the "Trailer - Build" category on the side bar or CLICK HERE.
To view all of my trailer gear and decorating posts CLICK HERE.
Labels:
Trailer - Build,
Trailer - The Glampette
Saturday, May 11, 2013
Trailer Update: Overhead Shelf Angles, Battery Charger, and Coupler
Because the trailer is so small Fred, my builder, suggested adding two small overhead shelves for storage. He made them possible by adding metal angles that wooden shelves can be screwed to for stability.
Fred will build the wooden shelves with a lip on the front to hold small storage baskets/containers in place while I'm on the road.
I'm going to paint the shelves myself when I return to San Jose. I'm thinking they should be the same aqua blue as the cabinets I'll be building.
To keep the trailer load balanced I'll only be storing lightweight items in the overhead shelves. Clothes, toiletries, and probably the tent poles and fabric for the awning I'll be making will all store quite nicely in these small nooks.
For the fuse panel Fred left a space for the solar set up. It's a major expense and I'm not sure I'll need one so I want to take the trailer out for a while to see if it's going to be a good investment or money I should have saved.
You may recall he added small tabs to the top of the trailer so that I'll have somewhere to attach a 100 watt solar panel if I decide I need one at a later date.
And this is my AGM (sealed) battery now securely held in place by this nifty battery holder he built. Above it is a battery charger which will allow the on-board battery to charge when the car is in motion. I'll be adding an isolator so that it won't drain my car battery once the tow vehicle is turned off.
And a close up of the coupler and safety chains.
We're definitely in the homestretch. I spoke with him on the phone recently and he said he's now skinned the tongue box. Just a few more details to go.
Labels:
Trailer - Build,
Trailer - The Glampette
Tuesday, April 30, 2013
Trailer Update: Almost done!
I swear. If my trailer were my daughter these shots would be the equivalent of her prom pictures. LOL. She looks all grown up outside in the sunlight. Seriously, it almost brings a tear to my eye :´)
I was joking with Fred, my trailer builder after I saw these pictures that if a 10 foot Shasta is a canned ham she must be a canned SPAM.
I have to say I really love my baby moon hubcaps from Vintage Trailer Supply and that we powder coated the chassis, wheels, and fenders yellow. They make the whole thing *POP* even before painting the cabin.
She's so tiny! She looks smaller now than she has in his garage. It makes her even cuter!
The door is large for easy entry and egress and so that if I ever want to use the trailer to haul anything I'll be able to get things in and out no problem.
One of the last things Fred has left to do is to cover the tongue box. Then he has to wait for me to come to Michigan to pick her up.
A lot of owners name their trailers, kind of like boats. I have a name chosen but haven't decided when or how to reveal it. I may tell you soon, or make you wait until it's painted on her.
The trailer that inspired me to want one in the first place is named Audree.
I don't even recall how I stumbled upon Tiffany's blog The Fancy Farmgirl. Come to think of it, I was probably searching for Tiny Houses for my "Favorite Spaces" Pinterest board.
That's when I saw a post titled "THE CUTEST LITTLE TRAILER IN A COUNTRY MILE." It was all about Audree and full of fantastic pictures (Tiffany is a professional, free-lance photographer). She had purchased and decorated her vintage, 1959, Fireball trailer and, well, the rest is history.
It was my first introduction to the concept of glamping (camping in a glamorous way). It took just one look and I was hooked! Can you blame me? Have you ever seen anything more fun and flirty than Audree? I hadn't. In my heart of hearts I wanted a tiny trailer right then and there.
While I'd love to have something as large as Audree size considerations included not wanting to upgrade my everyday car to a larger, gas guzzling, tow vehicle, storage, parking, and even towing all made me lean towards thinking that, for lil' ol' me taking overnight trips around the Bay Area, smaller would be better.
My trailer will never look as vintage cool as Audree but I'm hoping it'll look just as cute in its own way.
If you love vintage travel trailers as much as I do go check out Tiffany's blog. Here are direct links to more posts about Audree:
COWGIRL CAMPOUT
A VERY AUDREE CHRISTMAS
MAIDEN VOYAGE
By the time you come back I'll probably have a new trailer update published for you to catch up on :)
To follow my entire build thread from beginning to end just click on the "Trailer - Build" category on the side bar or CLICK HERE.
To view all of my trailer gear and decorating posts CLICK HERE.
Labels:
Trailer - Build,
Trailer - The Glampette
Monday, April 29, 2013
Trailer Update: The entry door
What's that on the back of my trailer? A door! And a door handle and deadbolt lock! And not just any old door lock. This is one spot where I decided to upgrade and go with a more modern option. Some online research and I found the keyless RV Lock by The Mobile Outfitters. It includes a remote fob that will allow me to open the door as I approach it. I'm thinking that may come in handy at night once it's dark out. No need to fiddle with keys or a flashlight.
Purchased at Dyers RV Parts and Accessories, at 7x the cost of a standard door lock it was expensive but since it's one of my main lines of security it made sense to spend more to be more safe from break ins.
You'll also notice a peep hole in the upper center of the door. Though Fred encouraged me to add a window to the door I was reluctant to for two reasons:
1. I didn't want to feel like I'm in a fishbowl when I'm in the trailer. With windows large enough for emergency egress on both sides I felt a third window would be too much.
2. Not having a window within easy reach of the door lock may make my trailer less attractive to a thief who wants to break in and steal my stuff. No popping out a small window, reaching in and unlocking the door from the inside.
Fred needed to add an extra metal plate to thicken the door just a bit to properly fit the handle and lock. It's also good because it will give the handle area some extra support.
The interior of the cabin. At the moment you can see through the tongue box on the other end.
Interior door handle view.
And the door hinge.
As Fred said "Closing in on it. A few more details to finish this week."
Soon, very soon. Eeeeeeeeek. I can hardly wait.
To follow the entire build thread from beginning to end just click on the "Trailer - Build" category on the side bar or CLICK HERE.
To view all of my trailer gear and decorating posts CLICK HERE.
Labels:
Trailer - Build,
Trailer - The Glampette
Subscribe to:
Posts (Atom)